1 comment
Accepting your first ride request as an Uber driver can be nerve wracking if you don’t know what to expect. To help you prepare, you can read these tips from Rideguru contributor, a fellow veteran Los Angeles driver, Sergio Avedian.

When starting something new, the fear of the unknown often holds us back. The what-ifs and what-abouts we project keep us from exploring a new opportunity that could lead to our next adventure. To overcome our fears and uncertainties, it helps to get advice from someone with first-hand experience. If you are a new Uber driver you may be unsure about taking your first trip or getting started. Will you be able to navigate the roads, converse with your riders, and stay safe while driving? Whatever your concerns might be, you’re not alone. There are millions of Uber drivers around the world. Undoubtedly, someone has felt the same way. How did they venture into the unknown?
Before you drive for the first time, get to know the areas you’ll be driving around. While the Uber driver app is integrated with Waze and Google Maps to guide your trips, your knowledge for the neighborhoods will help you feel confident on the road. Whether you drive in the city or suburbs, this familiarity will keep you on track.
Read your rider’s mood when they enter your vehicle, some riders want to chat while others like to relax quietly in your backseat. Start off with a friendly greeting and ask how the rider’s day is going to gauge their mood. If a rider cheerfully responds, it’s likely that they are up for some banter and conversation. When your greeting receives little enthusiasm, the rider probably prefers silence. Go with the passenger’s flow. Not sure what to talk about with your riders? I suggest using the pickup area to spark dialogue. When you’re picking up a rider near a college campus, they could be a student. This opens up conversation about classes, spring or winter break, college sports, and other college-related topics. The trip destination can similarly inspire discussion. If your rider is heading to the airport, you could ask if they’re going on vacation or a business trip.
When you arrive at the pickup location and the passenger isn't ready to go, you can either call or text your rider anonymously through the Uber driver app. I prefer texting since Uber has preset messages ready to be sent with the push of a button. If your text is not responded to and parking is not convenient, you can always call your passenger. Ask about the best way to identify them: appearance, clothes, standing spot, and so on.
I have done thousands of rides with a 4.93 rating, what’s the secret to my high rating and glowing rider comments? I'm outgoing, cordial but no nonsense. It's your private car, it's your private space. Have fun with it! Your positive demeanor and friendly spirit are contagious and will make your rider’s day brighter. A simple smile or pleasant conversation can make a big difference in getting additional tips.
You have done all the paperwork, passed the background check, got your car inspected, downloaded the Uber driver app on your phone and now you are ready to accept your first ride request. Unfortunately, Uber does not have too many tutorials and no in person training sessions. Don't fear! I will guide you step by step through the Uber driver app. When you turn your app on, you will first see this, I have an Android device but Apple devices should be very similar!
Before you click that GO button, you should thoroughly familiarize yourself with the driver app. Don't be afraid, you can't mess it up, click on pretty much every tab you see on the driver app, it will just open new windows and most are pretty self explanatory, however here are some tips on how to navigate it.

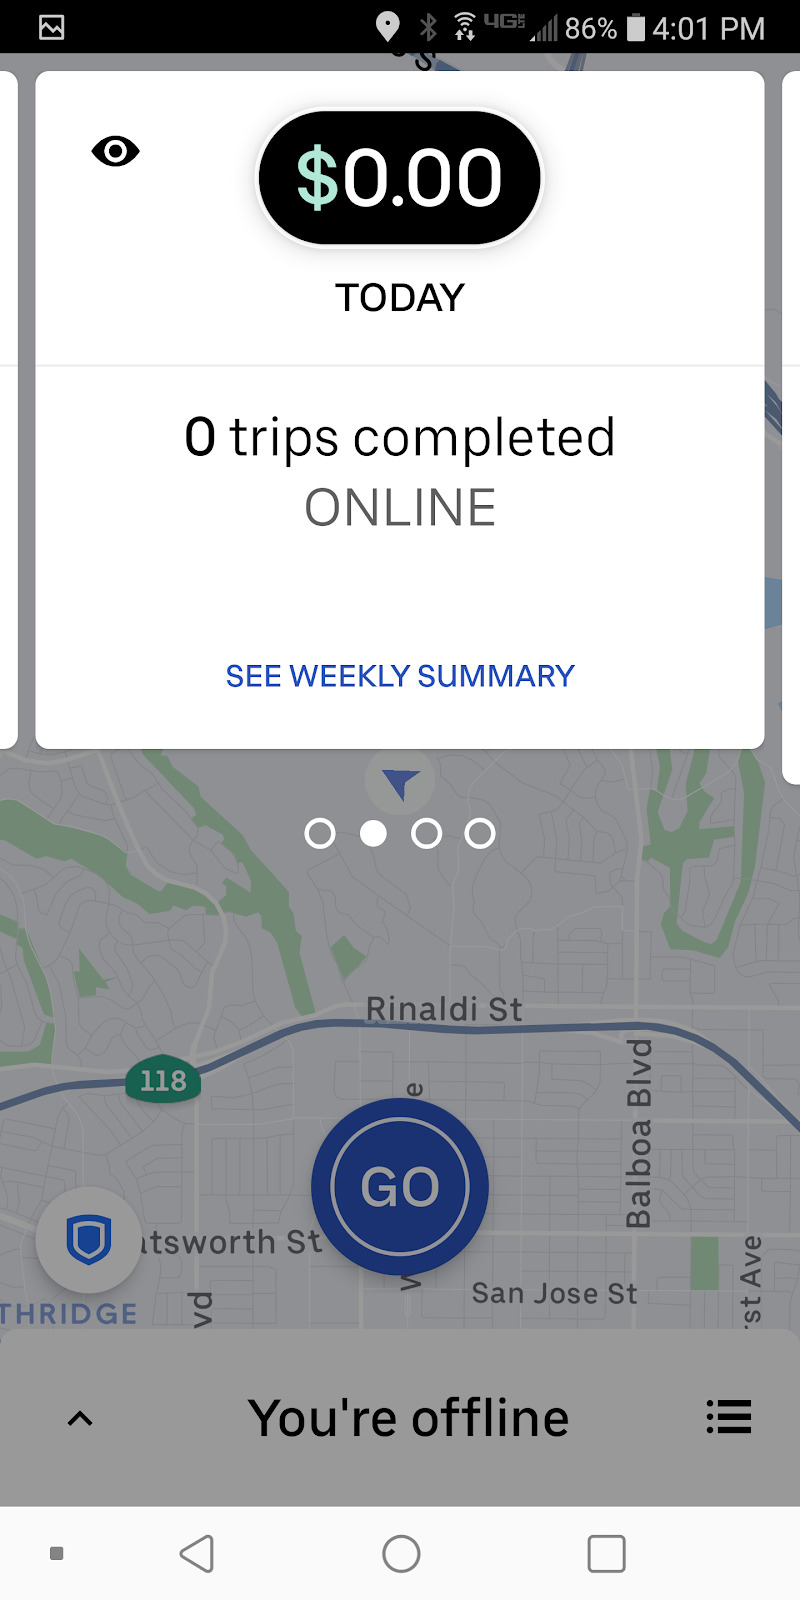
This is the first screen you will see. As you can tell, I am offline. When you click on the search sign on the upper left hand corner, that is the Destination Filter. It is a very useful tool for drivers to position themselves in the city but most drivers use it to go home at the end of their shift. This is what it looks like when you click on it and set it to your desired destination, don't make it too close to your current location.

I have set the destination to a busy place in Los Angeles about 30 miles away. The Uber algorithm will try to find rides going in that direction and it should eliminate ride requests going the opposite direction. You have 2 Destination Filters in a 24 hour period, so don’t burn them too quickly.
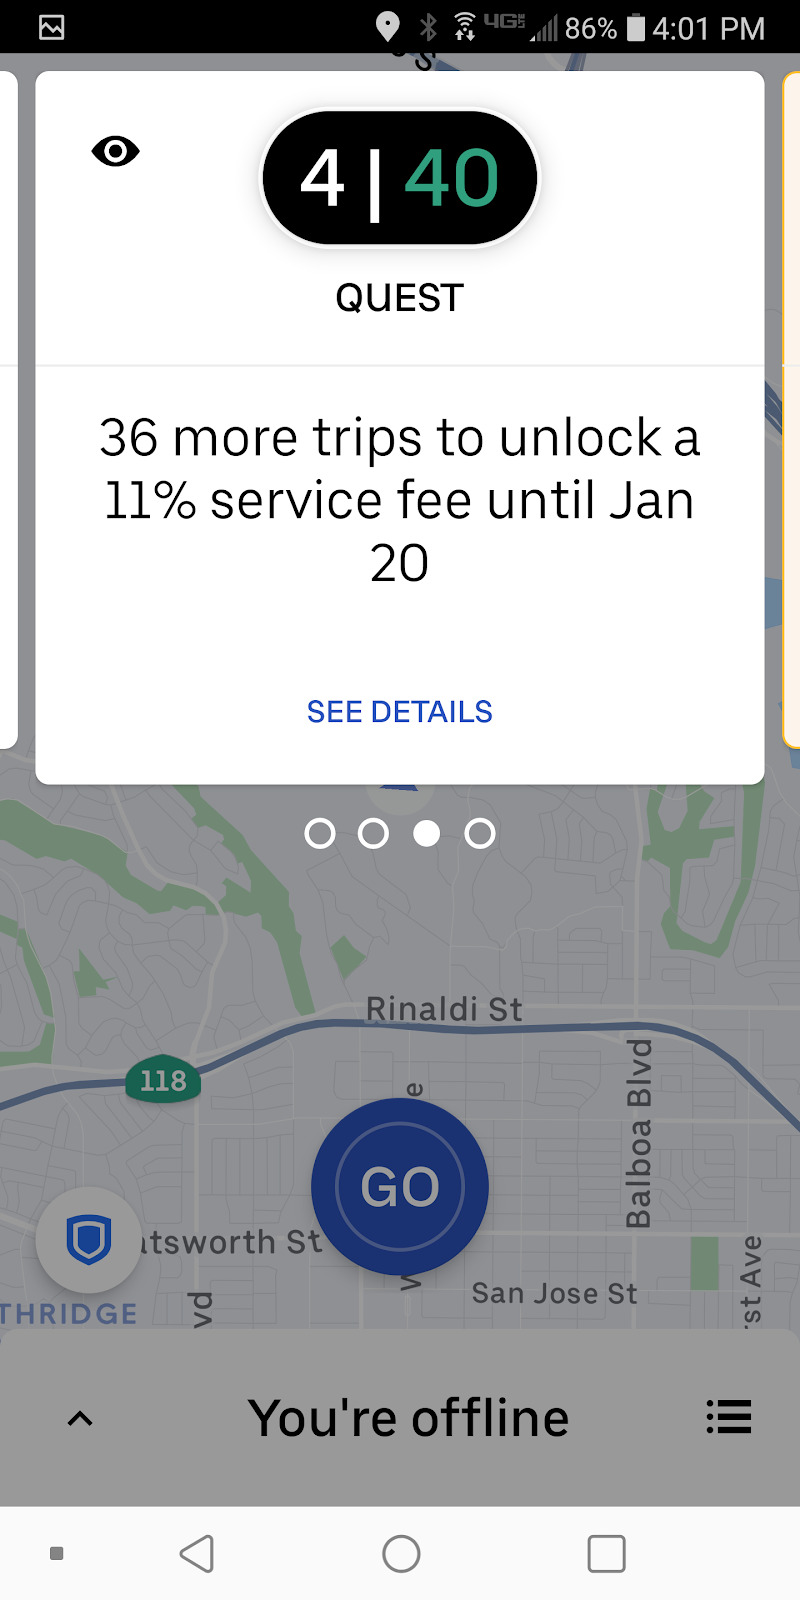
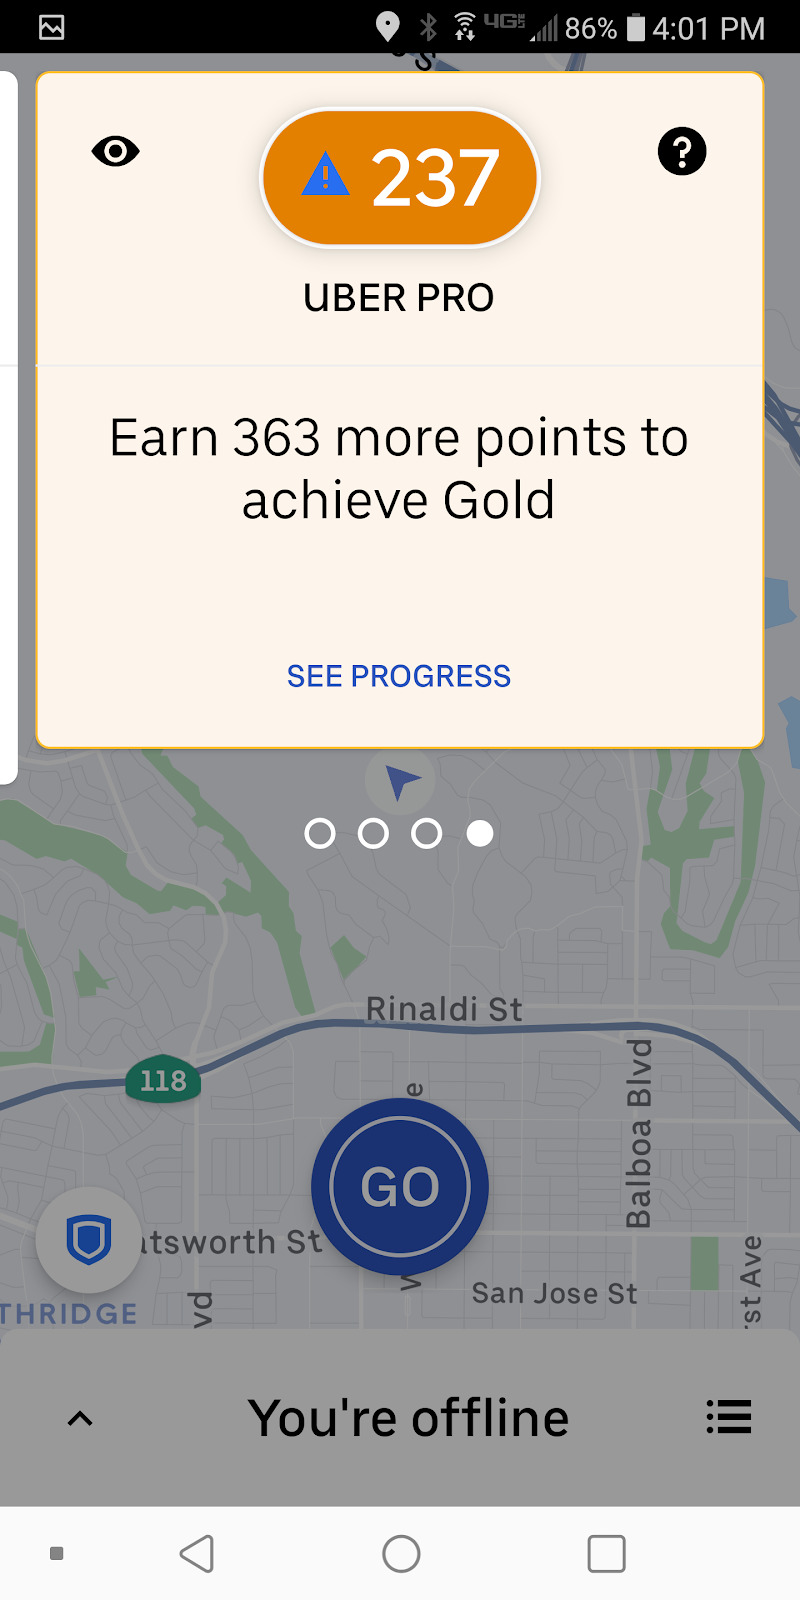
Now, lets move to the top middle of the app, where you see the pay for the last trip or by clicking on it and toggling through, you will see these four separate screens below, you can set it to anyone of those 4 and it will remain there until you turn your app off or decide to change it.

Next will be your picture on the upper right hand corner of the app, you will see these screens similar to this when you click on it.

You should definitely explore all the additional screens that will pop up when you click Earnings, your picture again for your ratings history and Account to upload documents, setting your bank account for Direct Deposit, inspection and insurance forms etc. They are very easy to navigate and learn.
Next, let's move to the lower left hand corner of the app. This is a very important feature on your driver app regarding your safety. By just touching the shield, you will be able to call 911 and this is what the screen looks like. You can also set up the Follow My Ride feature through the app for your designated contacts to be able to know where you are at all times. It is a very useful feature especially for female Uber drivers. You can set that feature up by a few clicks!

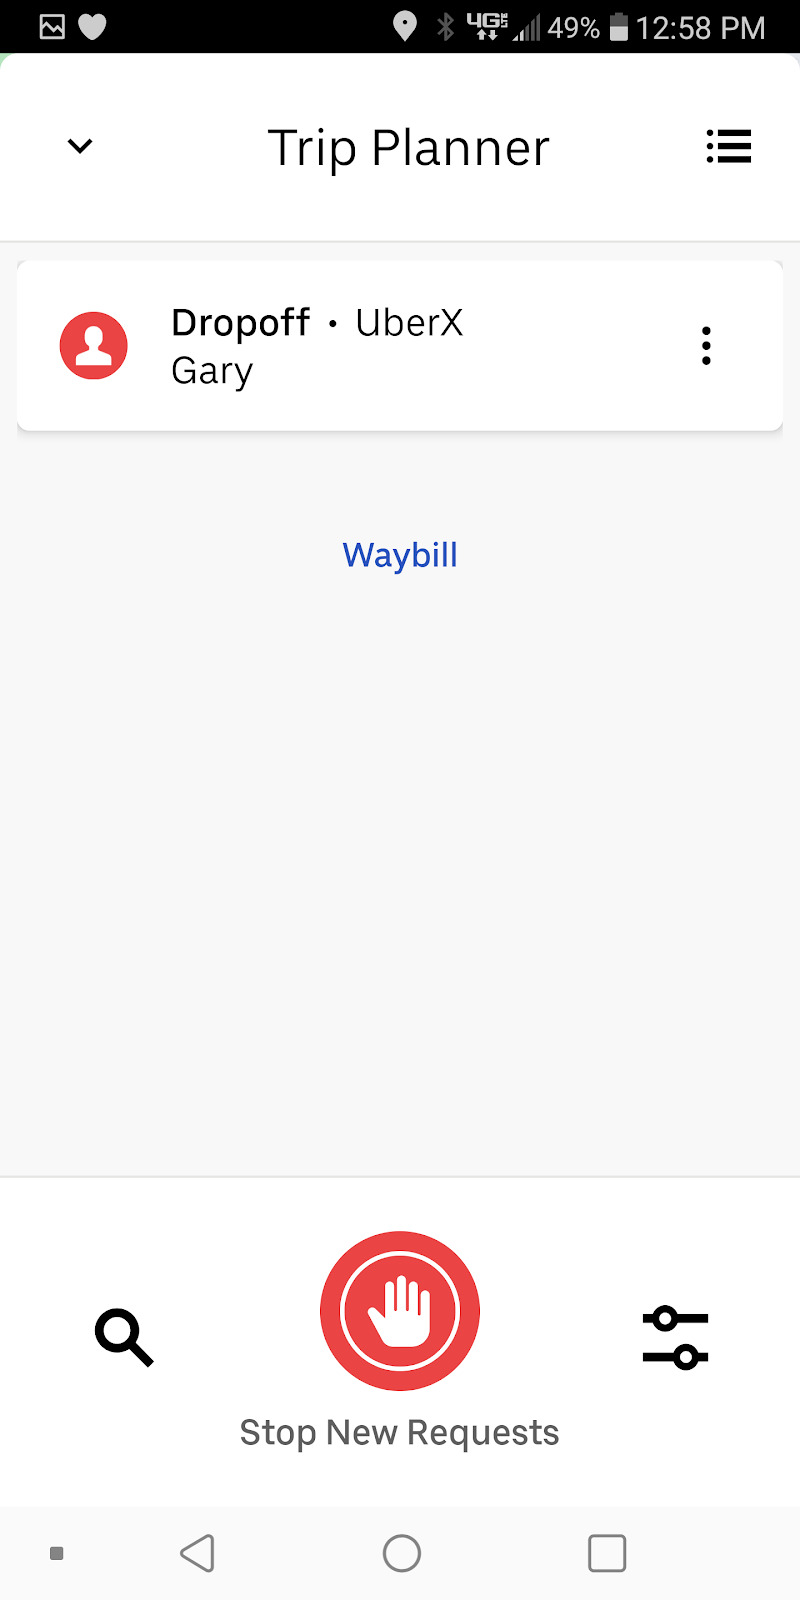
Next, let's get into the driver menu screen by clicking the three dots at the lower right hand corner of the app. (First screenshot posted above) When you click on it it will present you with your existing incentives as well a Waybill for your last ride and your online time. There's a 12 hour driving limit with Uber.

The following is what we see in CA on the request screen these days, granted it will be very different from other states due to the massive changes Uber has instituted over the past couple of months. I am certain these changes are due to AB5 and I have written extensively about them on RideGuru. Hopefully, Uber will release these features nationwide. The following links will get you to all the articles I've written on Rideguru regarding the subject.
Uber is Making Big Changes in California for Drivers.
Drivers are Finally Getting What They Want!
Why Uber and Lyft Despise the California AB5 Bill.
Here goes nothing, you are about to turn your app on accept your first ride request, LET’S GO! Click on GO and you are online, the waiting game begins, hopefully within a few minutes you will get pinged, the following screens are easy to follow.


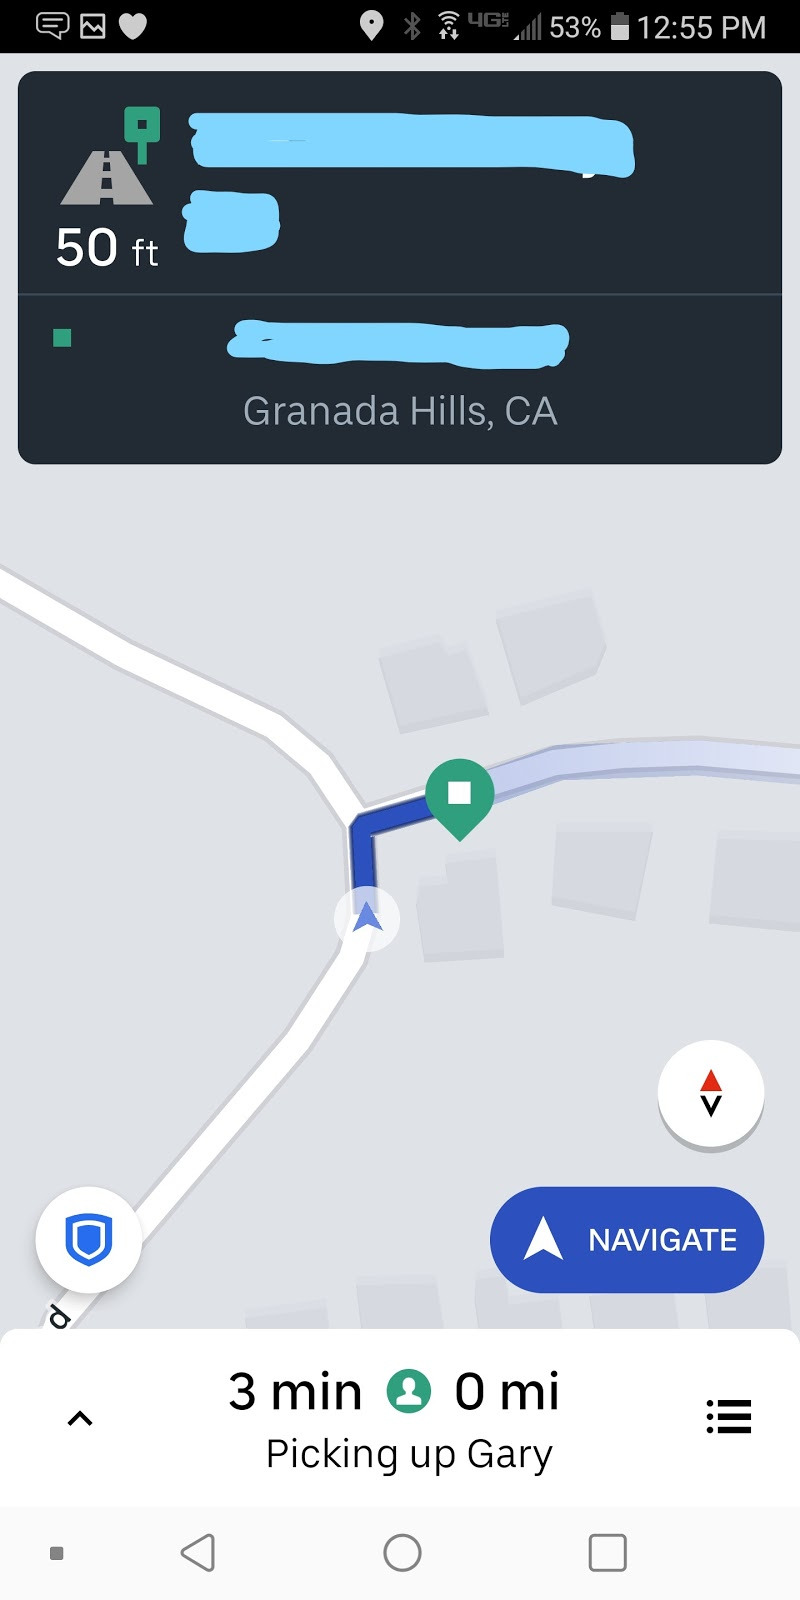
Once you accept the request, you will automatically be directed to the third screen above, which will give you turn by turn guidance to the pick-up address. If you want to use Google Maps or Waze you can click on the Navigate Button on the lower right hand corner of the app. Now you are at the pick-up address, you will see the following.

As you can see, there's a clock under Rider Notified. The passenger has two minutes to get in your car, otherwise they will be charged a waiting fee for another three minutes after which you may cancel the ride and collect a cancellation fee.
As I had mentioned before, you may contact your passenger by either calling or texting through the driver app. Just click on the phone icon to the left of the passenger name, you will see the following screen. As you may have noticed there are preset text messages for your convenience or you can call the passenger by clicking on the phone icon on this screen.

Now the passenger is in your car and you are ready to start the ride. Slide the green Start UberX tab to the right, direction of the arrow, you are on your way. The following will be the screen that you'll encounter.

Again, you may follow the directions via the Uber Navigation or click the Navigate button to use your preset choice of GPS. I use Google Maps!
As I mentioned previously, you can click on the Shield on the lower left hand corner of the app, screenshot above, if you feel that your safety is in jeopardy to call 911 or for other emergencies.
By clicking the passenger menu, the three lines on the lower right hand corner of the app, you will see this screen. This is where you can end the ride early due to unforeseen circumstances before you get to the final destination or to stop receiving new requests.

You have made it, your first trip is about to be over, this is the screen you will see.

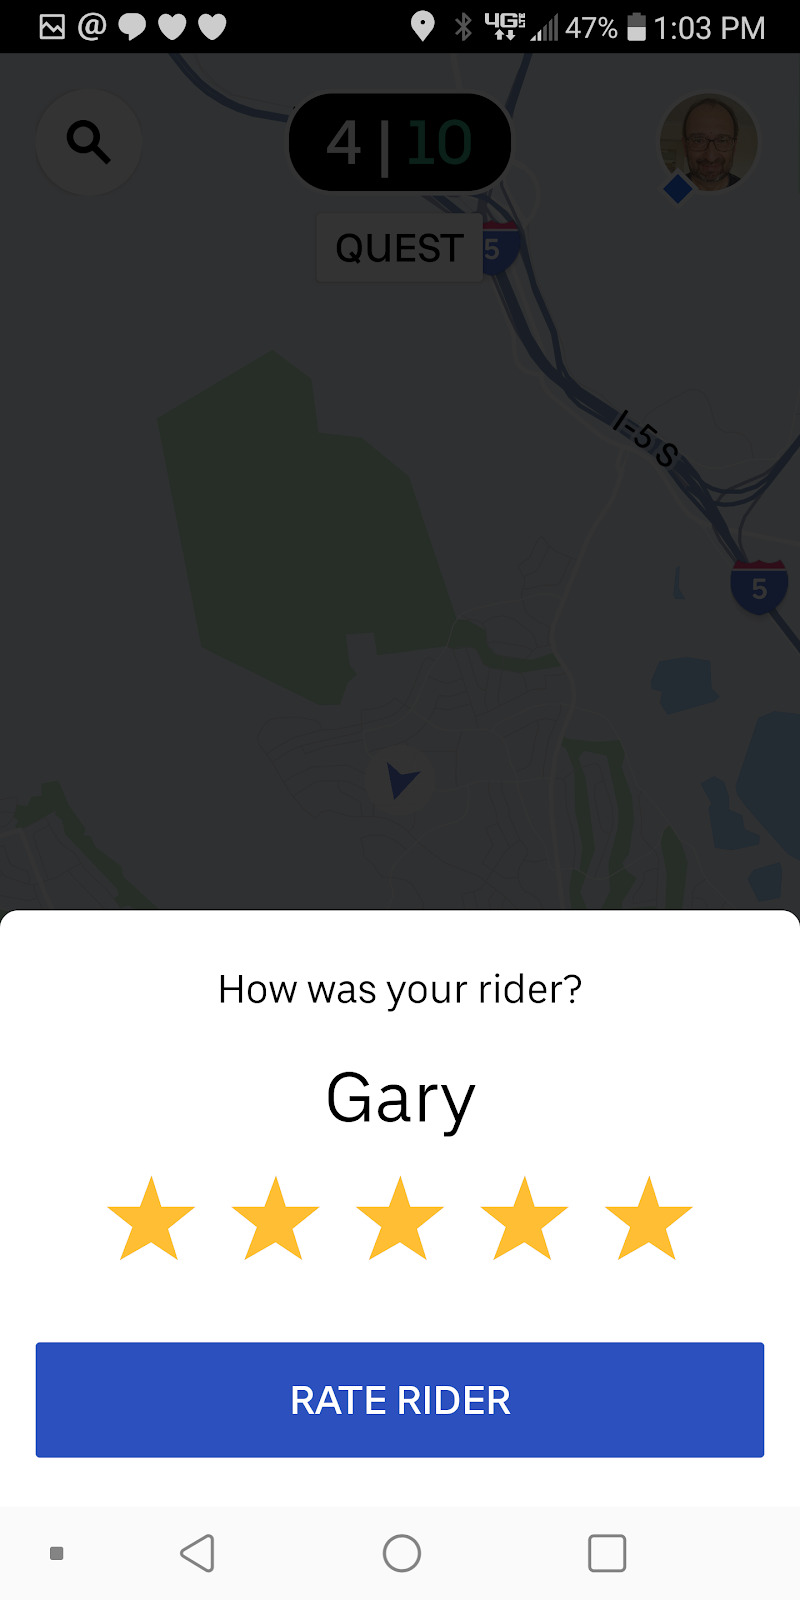
Just like you had to slide the green tab to the right to start the ride, now you have to slide the red tab to the right to end the ride. Once you do that you will be presented with the mandatory passenger rating screen (above right). After you rate your rides, if you choose to stay online, you will be receive additional pings for more rides!
Good luck, have fun, let your passengers know you're a new driver, most will cut you slack if you mess up.
Uber says my account is active. What does that mean?
This means that your background check is completed and all your required documents have been uploaded and approved. There are still a few quick steps that you need to take. The app will prompt you to take a photo of yourself for your account and you should add your banking info to vault.uber.com.
How will I know when I'm getting a ride request? How do I accept?
When you get a trip request, your screen will flash and a sound will ping. You have 8-12 seconds to accept the trip request. Just press anywhere on your screen to accept.
When should I swipe 'Start Uber X’?
After the rider enters your vehicle and you confirm their name.
I didn't start or end a trip on-time. What do I do?
Go into your Trip History and tap on the trip. At the top of the screen next to the ride in question you will see a question mark icon, then tap "I had an issue with this fare." You can then select "I didn't begin or end the trip on time" and fill in the pick-up and drop-off locations. Uber will make the adjustment!
What if my app isn't working?
Download a new version of the driver app! You can also reset the app by forcing it to quit, if that does not work then uninstall and install the app again.
When and how do I get paid?
Uber drivers are paid via direct deposit weekly or the Instant Pay feature after each ride if they choose to do so, there is a 50 cent charge for each transaction.
Can I pick up riders at the airport?
Yes! Drivers can both drop off and pick up at most airports in the nation. Check your local guidelines if a placard is needed. To get the placard, you must complete an exam but don't fear, it is very easy to do.
What if the rider wants to change destinations or make multiple stops?
That's OK! Don't end the trip, just ask the rider to delete their previous destination in the rider app and enter the new address. You'll still be paid for any additional time and distance traveled.
My rider wants me to wait. What should I do?
If a rider asks you to wait, you're welcome to do so. Just keep the trip running. However, if you don't want to or can't wait, just ask the rider to request another Uber when they're done.
Comments
Tutorials make the onboarding process smoother. Just like mastering the strategies of gunspin understanding the features and navigation of an app can greatly improve your driving experience and increase your confidence on the road.